TradingView · Invite-only · Lifetime updates
Founding: first 50

Stop stacking indicators. Trade A+ setups with one dashboard.

One elite TradingView command center for Smart Money Concepts — score, timing, regime, risk, and size. Score quality, Mode timing (Long/Short/Early/Watch), regime, RS, direction-aware risk, and exact size — plus a Professional Manual and free lifetime updates.

  • $127 one-time · no subscription
  • 30-day money-back guarantee
  • Manual instant · invite ~24 hours
  • First 50: 50% off future tools

Tip: tap any dashboard row on the right for a plain-English explainer.

A+

Banger A+ Pro

Tap any row · illustrative elite example

Full Opt

Timing and side — not strength. ✅ LONG / 🔴 SHORT = Confirmed entry live. 🔵 EARLY = forming. ⏳ WATCH = no fresh signal (plan and wait). Trading Mode preset shows in parentheses.

First month

Only take Confirmed LONG or SHORT. Early is for study. High score + WATCH means wait for the flip.

Light adjust

Show Early / Confirmed / Bearish Short toggles. Trading Mode: Conservative (stricter), Balanced (default), Aggressive (more day/momentum-oriented).

Full guide below →

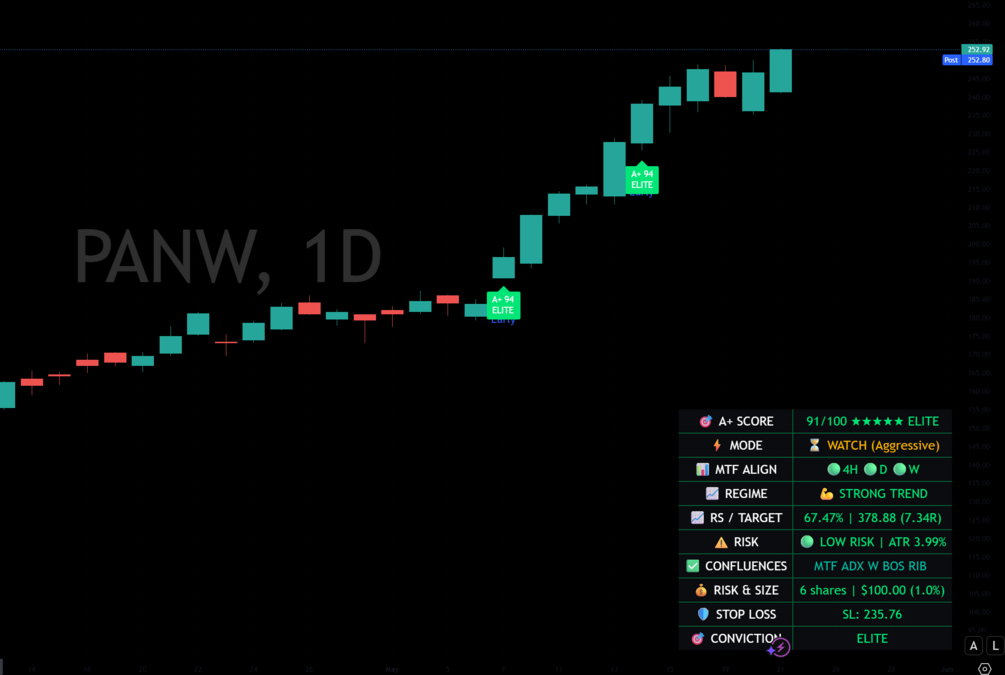
94 ELITE + WATCH = wait for Confirmed Long/Short. Mode shows side + timing. Score shows strength. Tap rows to learn.

One-time price

$127 · no subscription

Guarantee

30-day money-back

Access

Manual instant · invite ~24h

Updates

Free for life of the product

Read every row

What each dashboard line means

Plain-English guide to the live A+ table — what it means, how to use it in your first month, and what you can lightly adjust. Full strategies and deep tuning stay in the Professional Manual.

🎯
01

A+ SCORE

Example: 94/100 ★★★★★ ELITE

Overall setup quality from 0–100. Higher = more factors agreeing. Bands: ELITE · STRONG · GOOD · FAIR · WEAK. Score is strength — never an entry by itself.

First month rule

Prefer solid scores (often 70+). Always pair with Mode = Confirmed Long/Short and HIGH/ELITE Conviction before full size.

Can I adjust it?

Inputs → Base A+ Minimum Score. Trading Mode also shifts selectivity. Leave defaults for 30–50 trades.

02

MODE

Example: ⏳ WATCH (Balanced)

Timing and side — not strength. ✅ LONG / 🔴 SHORT = Confirmed entry live. 🔵 EARLY = forming. ⏳ WATCH = no fresh signal (plan and wait). Trading Mode preset shows in parentheses.

First month rule

Only take Confirmed LONG or SHORT. Early is for study. High score + WATCH means wait for the flip.

Can I adjust it?

Show Early / Confirmed / Bearish Short toggles. Trading Mode: Conservative (stricter), Balanced (default), Aggressive (more day/momentum-oriented).

03

MTF ALIGN

Example: 🟢4H 🟢D 🟢W

Multi-timeframe bullish status for 4H · Daily · Weekly. Full green = highest alignment. Uses non-repainting higher-timeframe confirmation for stable readouts.

First month rule

Day trade: want 4H + Daily green. Swing: prioritize Daily + Weekly.

Can I adjust it?

Show 4H / Daily / Weekly Bull Status (keep On). Require Weekly Bullish Bias for swing edge.

📈
04

REGIME

Example: 💪 STRONG TREND

Market weather: STRONG TREND, TRENDING, or CHOPPY. Signals prefer healthy regimes; chop is where accounts bleed.

First month rule

Take Confirmed setups in Strong Trend or clear Trending. Stand aside or micro-size in Choppy.

Can I adjust it?

ADX Minimum for Trending and ATR lookback inputs. Raise ADX min for stricter trends.

📊
05

RS / TARGET

Example: +RS% | target (×R)

Relative strength vs SPY (when enabled on equities) plus projected target price and reward-to-risk (R). Target and stop are direction-aware for longs and shorts.

First month rule

On stocks, prefer constructive RS. Higher R only matters when Mode is Confirmed and Conviction is HIGH/ELITE.

Can I adjust it?

Use RS vs SPY (ON stocks, OFF crypto/forex). RS lookback + ATR stop/target multipliers shape the numbers.

06

RISK

Example: 🔴 HIGH RISK | ATR %

Volatility risk band from ATR context: LOW · MEDIUM · HIGH. High score does not cancel high risk — size and selectivity still matter.

First month rule

If RISK is HIGH, demand better Mode/Conviction or cut size. Never average down to “fix” a volatile name.

Can I adjust it?

Observational row. Control exposure with Risk Per Trade % and Stop Loss ATR Multiplier.

07

CONFLUENCES

Example: RS MTF ADX W BOS OB VOL RIB…

Live factor tags stacked right now. Elite work wants a cluster, not one lonely tag. Empty shows “Building…”.

First month rule

Journal the tag string every trade. After 30 trades you’ll see which clusters fit your style.

Can I adjust it?

You don’t toggle tags one-by-one. Filters (Weekly bias, RS, score floor, mode, shorts) change which setups surface.

$
08

RISK & SIZE

Example: shares/lots | $ risk (%)

Exact size from Account Size × Risk % ÷ stop distance. Stocks → shares; forex → lots; crypto → coins; else units.

First month rule

Never override size to “give it room.” Start Risk % at 0.75–1%. Update Account Size when capital changes.

Can I adjust it?

Inputs → Account Size ($) and Risk Per Trade (%). Wrong Account Size = wrong position size.

🛡
09

STOP LOSS

Example: SL: price

Suggested stop from ATR × stop multiplier, direction-aware (below for longs, above for shorts). Place it. Don’t widen it after entry.

First month rule

Hard rule: never move the stop further away to avoid a loss.

Can I adjust it?

Stop Loss ATR Multiplier. Target ATR Base Multiplier shapes projected R.

10

CONVICTION

Example: ELITE

Final confidence band from A+ Score: ELITE · VERY HIGH · HIGH · MEDIUM · LOW. Use for size and priority — not as a standalone signal.

First month rule

Require HIGH or ELITE with Confirmed Mode. Treat MEDIUM/LOW as research or skip.

Can I adjust it?

Not a separate slider. Be stricter via Base A+ Minimum and Conservative mode if you want fewer prints.

Remember: Defaults + Balanced mode + Confirmed only + HIGH/ELITE conviction for the first 30–50 trades. Small Input changes can big-shift signal frequency — change one thing at a time after you have a sample. Deep playbooks ship in the PDF manual.

Fit check

Built for traders who want process — not more noise

Clear fit protects both of us — better results for the right traders, fewer refunds and less support noise.

Good fit if you…

  • Day or swing traders who already respect risk and want cleaner selection
  • People drowning in 8–12 indicators and still guessing on entries
  • Traders who will follow a first-month playbook (Confirmed only, fixed risk %)
  • Equity, futures-style, crypto, or forex charts on TradingView (with RS rules)

Not a fit if you…

  • Anyone looking for guaranteed profits or “set and forget” income claims
  • Traders who refuse stops, risk rules, or journaling
  • People who want the full strategy dump free before buying the manual
  • Anyone who cannot use TradingView invite-only scripts

Zero guesswork

What happens after you buy

From checkout to first chart session — the path is simple and written down so nothing blocks you.

Get Banger A+ Pro — $127
  1. 01

    Instant

    Gumroad delivers the Professional Manual (PDF) to your email.

  2. 02

    Next

    Reply with your TradingView username + order number (Gumroad message recommended).

  3. 03

    Within ~24h

    You receive the private invite-only script. Add to chart.

  4. 04

    First session

    Set Account Size + Risk %. Balanced mode. Create Early & Confirmed alerts. Trade the process.

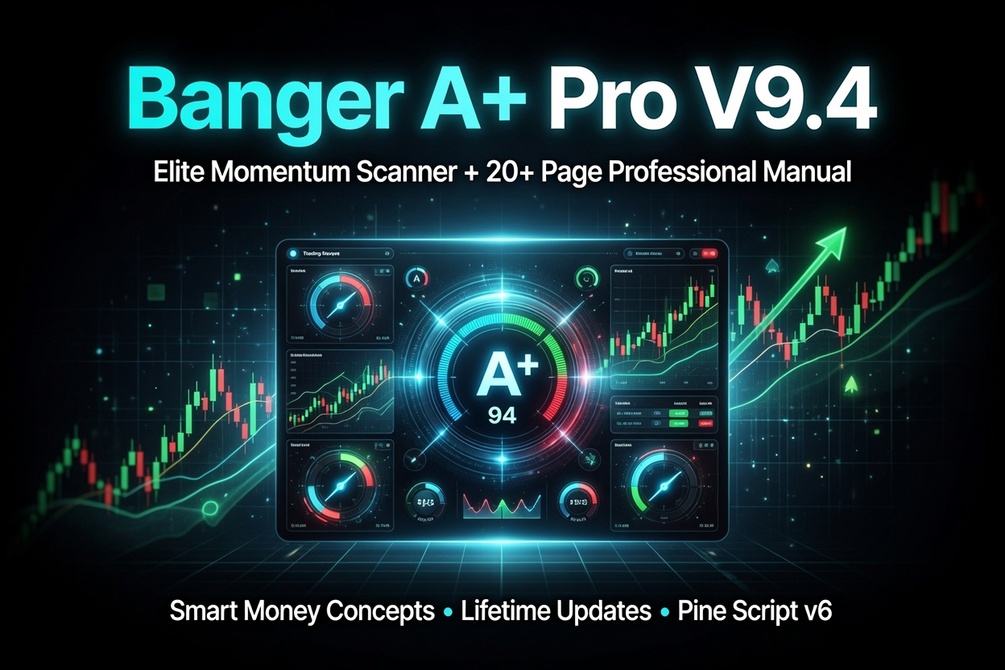
Banger A+ Pro indicator on TradingView

Flagship product

Banger A+ Pro

BANGER A+ PRO is a complete TradingView system built around the A+ Score dashboard: real-time setup quality, Mode (Confirmed Long/Short · Early · Watch), multi-timeframe alignment with non-repainting HTF confirmation, market regime, RS vs SPY, direction-aware targets & stops, multi-asset position size, active confluences, and Conviction. Mode-aware scoring adapts to Conservative, Balanced, or Aggressive. Built by a trader for traders — with a Professional Manual and lifetime free updates.

  • Full access to Banger A+ Pro on TradingView (invite-only, Pine v6)
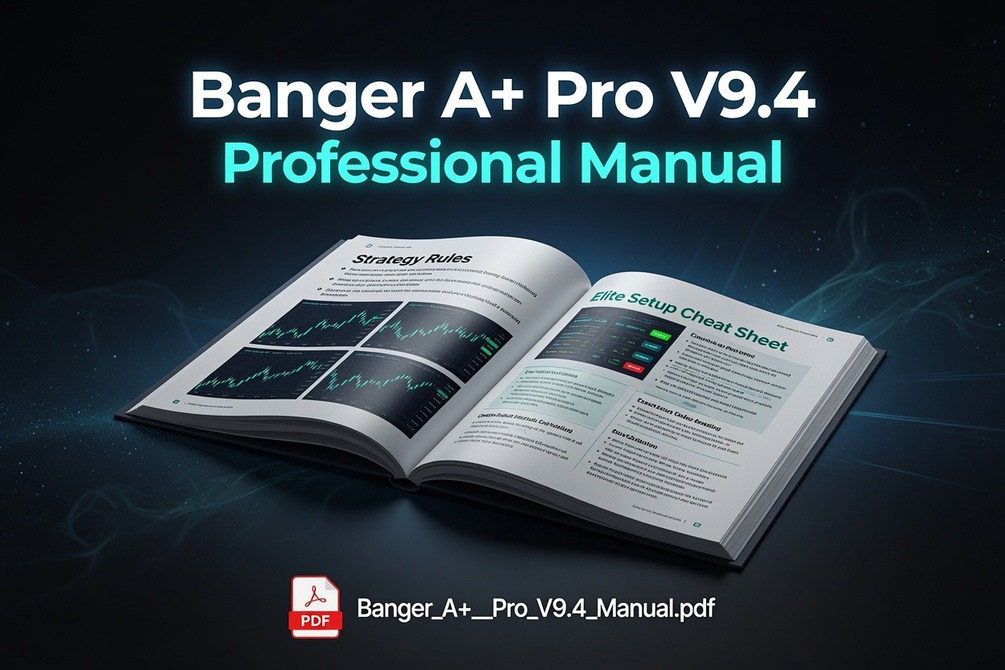
  • Professional User Manual (PDF) — instant after purchase
  • Lifetime free updates as new optimized builds ship
  • Built-in alerts for Early & Confirmed A+ signals
  • Founding perk (first 50): 50% off future Banger HQ indicators for life
  • 30-day money-back guarantee — no questions asked
First 50 only
Limited founding seats

First 50 buyers lock 50% off every future Banger HQ indicator — for life

While you’re early, founding customers of Banger A+ Pro get more than the scanner. Spots are limited so early supporters share in the suite as it grows — without giving the whole catalog away for free.

  • Lifetime free updates to Banger A+ Pro (always included)
  • 50% off every future Banger HQ indicator — for life
  • Priority invite when new tools drop
  • Same 30-day money-back guarantee on this purchase
Get Banger A+ Pro — $127

One-time $127 for A+ Pro. Founding discount is on future indicators.

How it works

  1. 1Buy Banger A+ Pro while founding seats remain (first 50 paid purchases).
  2. 2Your Gumroad order number is your founding proof — keep the receipt.
  3. 3When a new indicator launches, email or message with your order # for the 50% founding price.
  4. 4No subscription. No monthly fee. One-time A+ Pro today; discounted future tools forever.

Founding status applies to the first 50 completed paid purchases of Banger A+ Pro. Discount is 50% off the public launch price of each future Banger HQ indicator product we release. Does not apply to third-party tools, coaching, or non-indicator products unless stated. We may end new founding seats after 50 — existing founders keep the discount for life.

Clear choice

Why serious traders pick ownership over monthly suites

Typical monthly suites

  • $30–$100+ every month
  • Huge libraries — hard to master one process
  • Feature-count marketing
  • Cancel anytime (and lose access)

Banger A+ Pro

  • $127 once — lifetime updates
  • One command center + manual process
  • Score, Mode, regime, risk, size together
  • Founding 50: 50% off future Banger HQ tools

Command center

Everything that matters on one readout

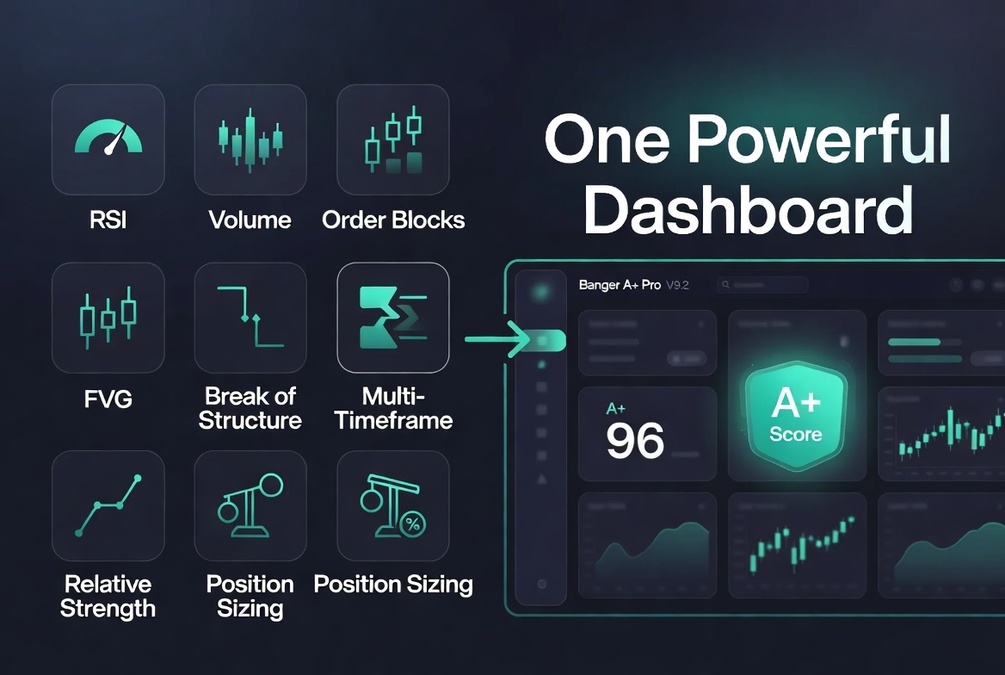
Six areas traders actually use under pressure — not fifty tools you’ll never master.

Full explanations

Mode-aware scoring

Conservative, Balanced, and Aggressive change selectivity — not just a label. Start Balanced.

Non-repainting MTF

4H · Daily · Weekly status uses confirmed higher-timeframe data for stable alignment.

Direction-aware risk

Stops, targets, and R flip correctly for longs and shorts.

Multi-asset size

Size formats for stocks (shares), forex (lots), crypto (coins), or units.

From the live engine

What the scanner shows you

Six command-center areas — explained for real-world use. Proprietary score weights and exact entry booleans stay in the script and Professional Manual. You get process, not a free clone of the code.

Mode-aware scoring

Conservative, Balanced, and Aggressive change selectivity — not just a label. Start Balanced.

Non-repainting MTF

4H · Daily · Weekly status uses confirmed higher-timeframe data for stable alignment.

Direction-aware risk

Stops, targets, and R flip correctly for longs and shorts.

Multi-asset size

Size formats for stocks (shares), forex (lots), crypto (coins), or units.

01

A+ Score (0–100)

Overall setup quality. Higher = more factors agreeing. 90+ with ELITE conviction is top tier.

What it means

The A+ Score is a modular composite grade from trend, structure, and momentum confluences. It replaces stacking RSI, MACD, volume, EMAs, and manual SMC drawings with one 0–100 number. Exact weights stay proprietary in the engine and Professional Manual.

How to read it

  • Dashboard bands: ELITE 90+ · STRONG 80+ · GOOD 70+ · FAIR / WEAK below.
  • Score is mode-aware: Conservative is stricter; Aggressive is more day/momentum-oriented; Balanced is the default.
  • Top-tier prints need multi-factor alignment — not a single tool firing alone.
  • Base A+ Minimum Score (typical default ~70) is your floor.
  • True top-of-scale scores are rare by design — if everything always prints 99, the scale is lying.

Real-world testing

Before every trade, read Score with Mode and Conviction — never alone. First 30–50 trades: defaults + only Confirmed Long/Short. Journal score at entry.

02

Mode: Long / Short / Early / Watch

Score measures strength. Mode tells you side and whether a fresh entry is live right now.

What it means

Even with a 94 ELITE score, Mode can show WATCH until a fresh Confirmed or Early signal fires. That is deliberate risk management: spacing and signal gates protect you from chasing. Confirmed Long and Confirmed Short are the primary “take it” states when other gates pass.

How to read it

  • ✅ LONG (Confirmed) — New high-probability long entry is live.
  • 🔴 SHORT (Confirmed) — New high-probability short entry is live (if shorts enabled).
  • 🔵 EARLY — Setup is forming; advanced only after you have a sample.
  • ⏳ WATCH — No fresh signal this bar. Plan, set alerts, wait.
  • Mode line also shows your Trading Mode preset in parentheses.
  • First 30–50 trades: ONLY Confirmed Long or Confirmed Short.

Real-world testing

Classic elite example: Score 94 ELITE + Mode WATCH means structure is excellent — wait for Confirmed. Built-in alerts fire on Early and Confirmed.

03

MTF alignment + market regime

Non-repainting 4H · Daily · Weekly gauges, plus Strong Trend / Trending / Choppy regime.

What it means

MTF Alignment uses confirmed higher-timeframe data so the table doesn’t rewrite unfinished HTF bars. Regime is your weather report — always check it before entering.

How to read it

  • Full green 4H · D · W = highest multi-timeframe agreement.
  • Swing: prioritize Weekly + Daily. Day: 4H + Daily is often enough.
  • STRONG TREND — clean directional environment; full size OK within risk rules.
  • TRENDING — good continuations; standard risk.
  • CHOPPY — reduce size or stand aside.
  • Weekly Bullish Bias can require long-term alignment for swing edge.

Real-world testing

Non-negotiables: Regime + Conviction + Mode. Skip or micro-size chop for 30 trades and compare results.

04

RS / Target + direction-aware stops

RS vs SPY on equities, projected target & R, ATR stop that flips for shorts.

What it means

Relative strength vs SPY (when enabled) is a major equity factor. Target price and stop are direction-aware: longs target above / stop below; shorts reverse. R scales with setup quality bands.

How to read it

  • Equities: leave Use RS vs SPY ON; prefer constructive RS on Confirmed longs.
  • Crypto / forex: turn RS vs SPY OFF.
  • RS / TARGET shows RS%, target price, and R together.
  • STOP LOSS shows suggested SL for the active side.
  • Stop and Target ATR multipliers are the main structural levers after Account Size & Risk %.

Real-world testing

Journal RS%, R, and side at entry. After 20–30 trades, review which clusters produced your best R.

05

Risk, size & multi-asset sizing

Volatility risk band + exact size in shares, lots, or coins from Account Size × Risk %.

What it means

RISK row shows a LOW / MEDIUM / HIGH volatility band from ATR context. RISK & SIZE computes dollars at risk and formats size by asset type. Always use the printed size.

How to read it

  • Set Account Size ($) to real capital; Risk Per Trade % start 0.75–1.
  • HIGH RISK means demand better Mode/Conviction or cut size — never ignore it because Score is high.
  • Trading Mode changes score selectivity (Conservative stricter / Aggressive more active).
  • Leave Advanced structure inputs at defaults until you have a sample.

Real-world testing

Paper or small size: lock 0.75–1% risk, Confirmed only, HIGH/ELITE, Strong Trend or Trending, exact dashboard size.

06

Active confluences + Conviction + alerts

Live tags explain why the score is high. Conviction is the final go / no-go. Alerts cover Early & Confirmed.

What it means

Confluence row lists stacked factors (RS, MTF, ADX, W, BOS, OB, PULL, VOL, RIB…). Conviction: ELITE 90+ · VERY HIGH 80–89 · HIGH 70–79 · MEDIUM · LOW. Built-in alerts fire on Early and Confirmed A+ prints.

How to read it

  • Elite entries want a cluster of quality tags — not one lonely check.
  • Building… means factors are still assembling — usually WATCH territory.
  • Conviction HIGH/ELITE + Confirmed Mode = first-month playbook.
  • Create alerts from the indicator after install.
  • Full walkthroughs live in the Professional Manual.

Real-world testing

When Score spikes, write the confluence string in your journal. After a month you’ll see which clusters fit your style.

Trader action guide — Mode on the dashboard

Strength and timing are separate on purpose. Side is included.

ModeMeaningWhat you should do
✅ LONGConfirmed high-probability long is liveTake long when elite gates pass
🔴 SHORTConfirmed high-probability short is liveTake short if shorts are in your plan
🔵 EARLYSetup is forming — early entry possibleStudy / advanced only after a sample
⏳ WATCHNo fresh signal — even if score is ELITEPlan, set alerts, wait for Confirmed

Conviction levels

  • ELITE (90+) — Best of the best. Full size, highest conviction.
  • VERY HIGH (80–89) — Strong — standard risk.
  • HIGH (70–79) — Solid for most plans.
  • MEDIUM (58–69) / LOW — Selective, smaller size, or wait.

Market regime

  • Strong Trend — Clean moves. Ideal; full size OK within rules.
  • Trending — Continuations, standard risk.
  • Choppy — Reduce size or stand aside.

Confluence tags

Why the score is high (or not)

Live tags audit stacked probability. Elite entries want a cluster — not a single lonely check.

RSRelative strength vs SPY

How the asset performs vs the S&P 500 (when RS vs SPY is on). Major equity factor with volume context.

MTFMulti-timeframe bull

Higher-timeframe agreement (4H · Daily · Weekly). Non-repainting HTF confirmation.

ADXTrend strength

Strong trend / ADX context. Used heavily in Regime and signal quality.

WWeekly bullish bias

Long-term directional filter. Strong for swing context when required.

BOSBreak of structure

Bullish or bearish structure shift. Core Smart Money Concept confirmation.

OBOrder block

Institutional demand/supply style conditions with volume context.

PULLPullback in trend

Pullback-with-trend style setup inside a strong regime.

VOLVolume surge

Participation confirming the move — fuel vs empty price action.

RIBRibbon / EMA stack

Short/medium EMA ribbon alignment supporting directional conditions.

TradingView settings

Settings: Inputs & Style

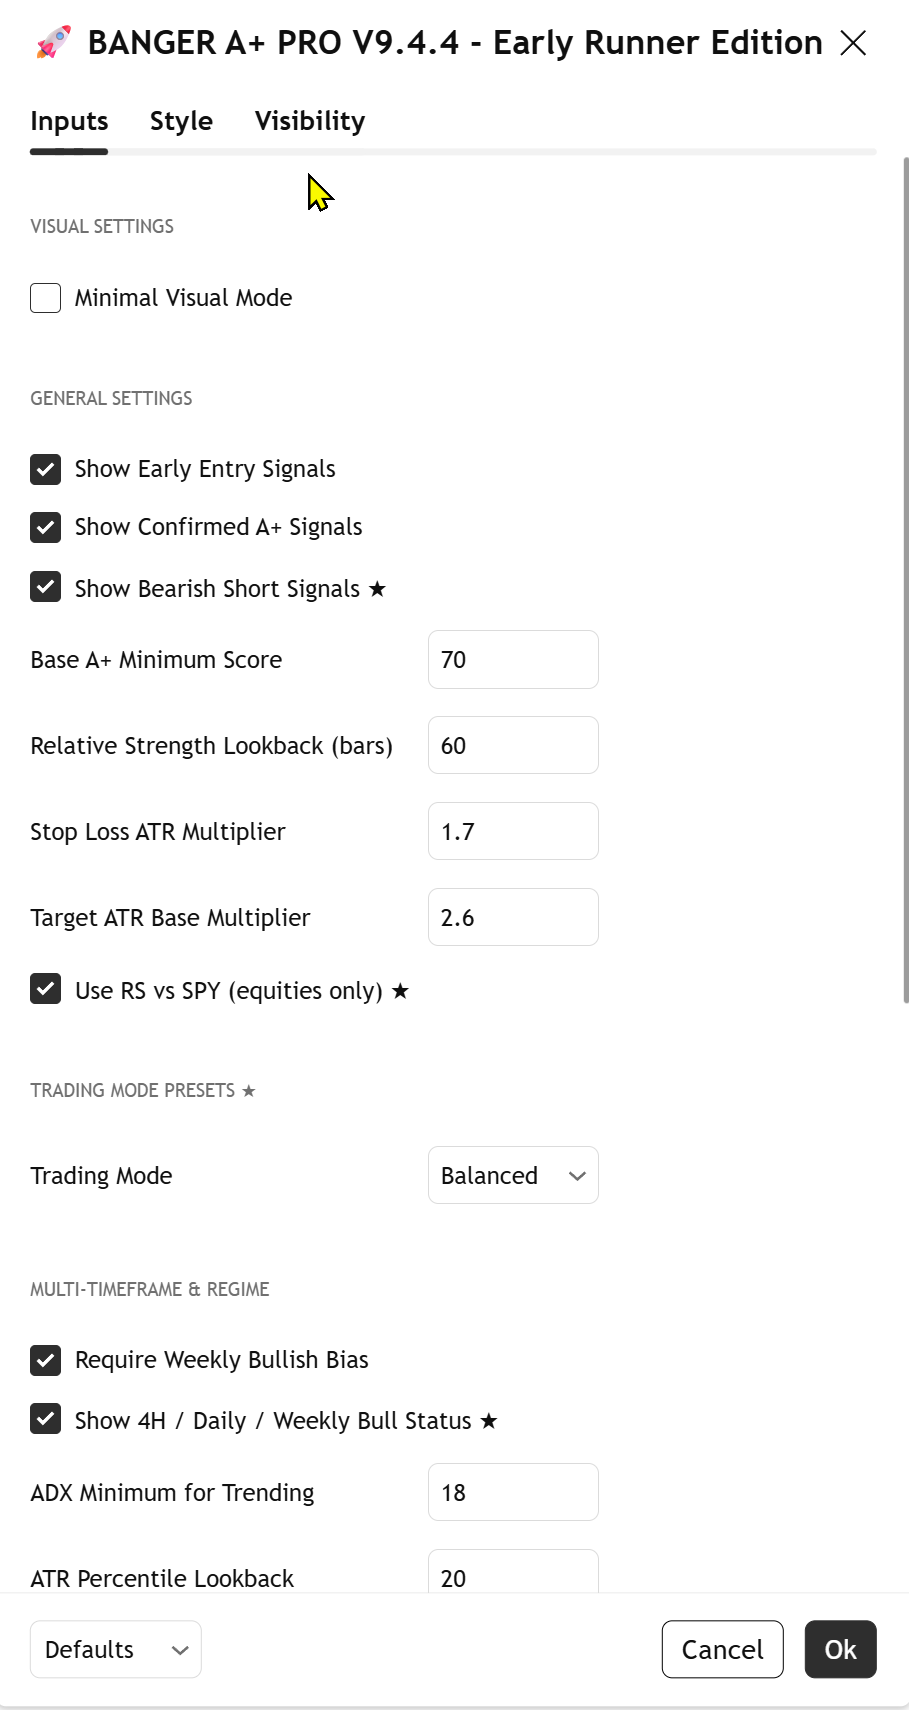
Three tabs: Inputs (behavior & risk), Style (markers & table cosmetics), Visibility (per-timeframe). Defaults are professional — change cosmetics anytime; change behavior only after 30–50 trades. Always trust your live Inputs panel after updates.

Inputs

Risk, signals, mode-aware presets, MTF & regime, dashboard layout, advanced structure.

Style

Signal colors, marker placement, tables, pane labels, status line.

Visibility

Which timeframes show which elements.

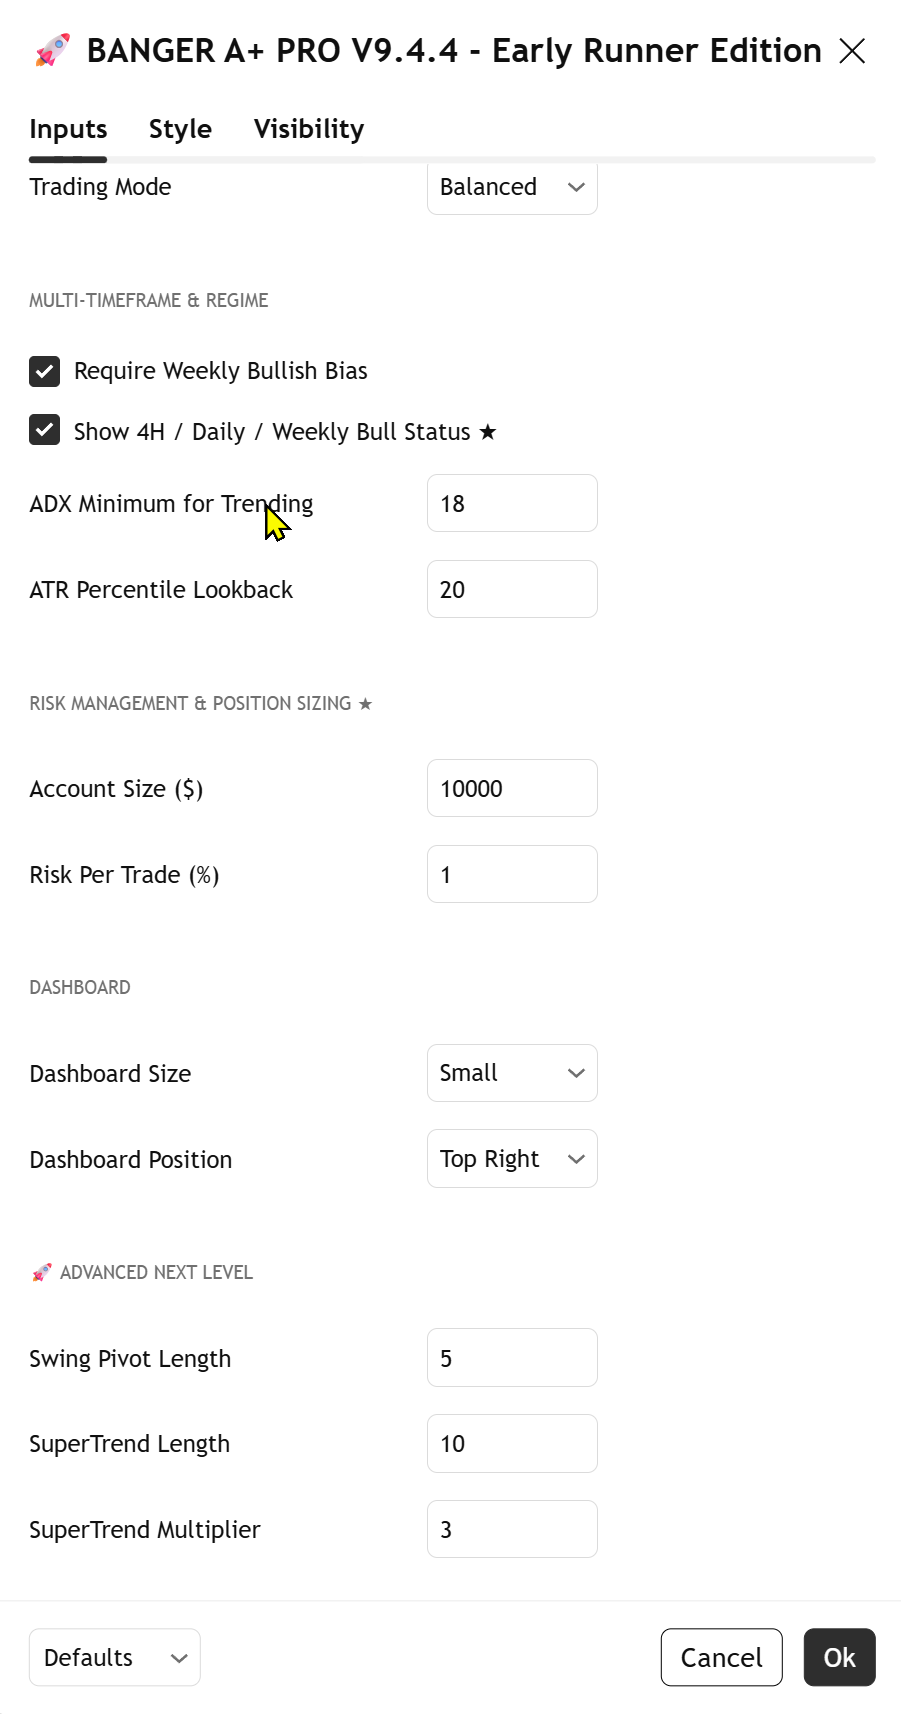
Inputs — signals, score floor, ATR multipliers, RS, trading mode, MTF & regime

Inputs — signals, score floor, ATR multipliers, RS, trading mode, MTF & regime

Inputs — risk & size, dashboard layout, advanced structure

Inputs — risk & size, dashboard layout, advanced structure

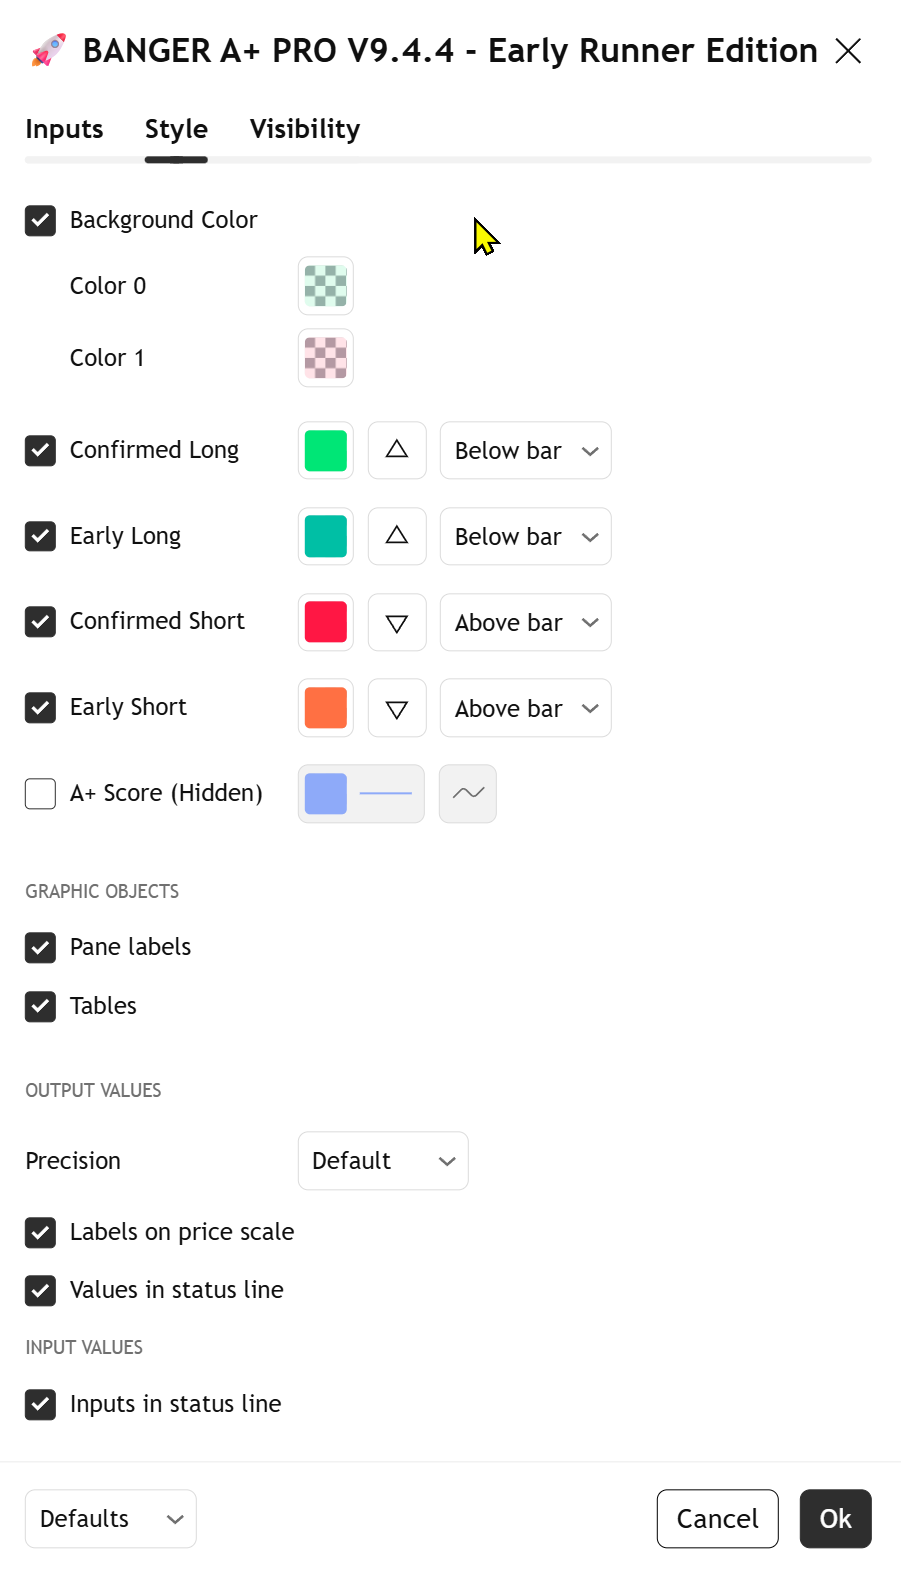
Style — signal colors, tables, status line

Style — signal colors, tables, status line

Starter recipe (first month)

  • Trading Mode: Balanced
  • Account Size ($): your real account
  • Risk Per Trade (%): 0.75 or 1
  • Base A+ Minimum: leave default
  • Show Confirmed: ON · trade Confirmed Long/Short only at first
  • Show Early: ON to study + for alerts
  • Use RS vs SPY: ON stocks · OFF crypto/forex
  • Require Weekly Bullish Bias: ON for swing edge
  • Dashboard Size: Medium · Position: your preference
  • Leave advanced structure alone for first month
  • Create TradingView alerts for Early & Confirmed

Pro tip: change cosmetics (Style) anytime. Change Inputs behavior one setting at a time after you have a sample. Never leave Account Size wrong — position size depends on it. Keep Tables ON. After any indicator update, re-check defaults on your live Inputs panel.

Inputs tab — behavior & risk

These controls change what the engine shows and how size is calculated. Start here after install.

Visual settings

Minimal Visual Mode

Off by default

Hides some dashboard detail for a cleaner panel.

General settings

Show Early Entry Signals

On

Early markers + Early alerts. Study first; trade Confirmed in month one.

Show Confirmed A+ Signals

On

Confirmed Long/Short — primary signals for your first sample.

Show Bearish Short Signals

On (optional)

Enables short-side signals when your plan allows shorts.

Base A+ Minimum Score

Typical default ~70

Floor for setups. Raise for fewer higher-quality prints.

Relative Strength Lookback

Typical default ~60 bars

RS vs SPY window on equities.

Stop Loss ATR Multiplier

Typical default ~1.7

Width of ATR-based stop (direction-aware).

Target ATR Base Multiplier

Typical default ~2.6

Base for projected target / R.

Use RS vs SPY (equities only)

On for stocks

Turn OFF for crypto and forex.

Trading mode presets

Trading Mode

Balanced (start here)

Changes score selectivity. Conservative = stricter. Aggressive = more day/momentum-oriented. Balanced = default.

Multi-timeframe & regime

Require Weekly Bullish Bias

On

Long-term filter for swing edge.

Show 4H / Daily / Weekly Bull Status

On

Non-repainting MTF ALIGN row.

ADX Minimum for Trending

Typical default ~18

Higher = stricter trend filter.

ATR Percentile Lookback

Typical default ~20

Volatility context window.

Risk management & position sizing

Account Size ($)

Your capital

Stocks → shares, forex → lots, crypto → coins.

Risk Per Trade (%)

0.75–1 recommended

Example: $10,000 × 1% = $100 risk.

Dashboard layout

Dashboard Size

Small / Medium / Large

Medium works well on most screens.

Dashboard Position

9 positions (often Top Right)

Place the panel where it doesn’t cover price.

Advanced next level

Swing Pivot Length

Leave default

Structure sensitivity. Don’t tweak early.

SuperTrend Length / Multiplier

Leave defaults

Used inside confirmed-trend logic. Leave alone for first month.

Style tab — colors & chart cosmetics

How Confirmed vs Early and long vs short look on the chart. Safe to personalize — just keep Confirmed visually distinct from Early.

Signal markers

Confirmed Long

Green ▲ below bar

Primary long take signal.

Early Long

Teal ▲ below bar

Study first.

Confirmed Short

Red ▼ above bar

Primary short take signal.

Early Short

Orange ▼ above bar

Study first.

Tables & status

Tables / pane labels

Keep On

The dashboard is the command center.

Status line options

Default OK

Turn off if the status bar feels crowded.

Field workflow

How to use Banger A+ Pro in real-world testing

Public field workflow. The Professional Manual has full checklists and walkthroughs. Proprietary score internals stay under the hood.

  1. Step 1

    1. Get access & add to chart

    Send TradingView username + order number. Day: 5m/15m/30m. Swing: 1H/4H/Daily.

  2. Step 2

    2. Configure the essentials

    Account Size + Risk % (0.75–1%). Balanced mode. Leave advanced defaults. Create Early & Confirmed alerts.

  3. Step 3

    3. Dashboard first — every trade

    Score · Mode · Conviction · Regime · MTF · Confluences · Size · Stop. Non-negotiables: Regime + Conviction + Mode.

  4. Step 4

    4. Elite entry gates

    Score ≥ min · Mode Confirmed Long/Short · Conviction HIGH/ELITE · MTF supportive · Regime tradeable · confluence cluster · equities: constructive RS when enabled.

  5. Step 5

    5. Size exactly — manage like a pro

    Use exact dashboard size. Direction-aware SL is the line. Partials at solid R when structure allows. Exit if structure breaks or Regime → Choppy.

  6. Step 6

    6. Skip list

    Below min score, Choppy, misaligned MTF, LOW/MEDIUM conviction, WATCH-only, chasing. Discipline beats frequency.

  7. Step 7

    7. Review weekly (30–50 trades)

    Journal Score, Mode side, Conviction, Regime, tags, R. Only then consider mode or filter tweaks.

Hard rules while testing

  • First 30–50 trades: defaults + Balanced + Confirmed Long/Short only + HIGH/ELITE.
  • In Choppy regimes: reduce size or stand aside.
  • Never widen the stop to “give it room.”
  • WATCH + ELITE score = wait for Confirmed.
  • Crypto/forex: RS vs SPY OFF.
  • Not financial advice. Trading involves risk. DYOR.

On the chart

Built for clarity under pressure

Full product page
Banger A+ Pro on TradingView

Built by a trader

Designed from real market experience — not theory decks

Banger HQ is the home of battle-tested tools for serious momentum traders. Banger A+ Pro is the flagship: one professional system around the A+ Score dashboard so you stop guessing and start running a process.

Questions after purchase? Reply to your Gumroad receipt or reach out on X.

What you walk away with

  • A+ scoring instead of noisy multi-indicator stacks
  • Side + timing Mode that stops chase entries
  • Risk rating and multi-asset position sizing
  • Professional Manual that turns scores into process
One-time purchase

$127

No monthly fees. Lifetime updates included.

  • Full access to Banger A+ Pro on TradingView (invite-only, Pine v6)
  • Professional User Manual (PDF) — instant after purchase
  • Lifetime free updates as new optimized builds ship
  • Built-in alerts for Early & Confirmed A+ signals
  • Founding perk (first 50): 50% off future Banger HQ indicators for life
  • 30-day money-back guarantee — no questions asked

Educational tools only. Trading involves substantial risk of loss. Not financial advice. You are solely responsible for your decisions.

Full risk disclaimer

FAQ

Questions — product, dashboard, and real-world use

Access and pricing answers, plus deeper “how do I actually use this?” questions for testing the scanner on live charts.

Do you offer refunds?+

Yes. 30-day money-back guarantee — no questions asked.

What is the founding customer offer?+

The first 50 paid buyers lock 50% off every future Banger HQ indicator for life, plus priority invites. Your Gumroad order number is proof. A+ Pro itself is still $127 one-time with lifetime updates for every buyer.

How do I claim 50% off a future indicator?+

Message us with your original A+ Pro order number when the new tool launches. We’ll confirm founding status and give the founding price.

Will I get future updates?+

Yes. Lifetime free updates to Banger A+ Pro are included. Founding customers also get 50% off separate future products.

How do I get access after buying?+

PDF manual is instant. Send TradingView username + order number via Gumroad message (recommended) or TradingView to @BangerDayTrades. Invites usually within 24 hours.

Is this a subscription?+

No. One-time $127. No monthly fees. Lifetime updates included. Many large suites charge every month — Banger HQ is ownership of one focused system.

What does Mode show (Long / Short / Early / Watch)?+

Mode is side + timing. Confirmed LONG or SHORT = fresh A+ entry. EARLY = forming. WATCH = no fresh signal — even if Score is ELITE. First month: only Confirmed Long/Short.

What is the difference between A+ Score and Mode?+

Score measures setup strength. Mode tells you if a new actionable long/short is live right now. High Score + WATCH means wait — not chase.

What are Conviction levels?+

ELITE (90+) · VERY HIGH (80–89) · HIGH (70–79) · MEDIUM · LOW. Use HIGH/ELITE with Confirmed Mode for first-month process.

What do Strong Trend / Trending / Choppy mean?+

Regime from trend-strength context. Strong Trend = clean. Trending = standard continuations. Choppy = reduce size or stand aside.

Is multi-timeframe data repainting?+

MTF alignment uses a non-repainting confirmed higher-timeframe approach so unfinished HTF bars don’t rewrite the dashboard mid-flight.

How do Conservative / Balanced / Aggressive differ?+

They change score selectivity and emphasis. Balanced is the start. Conservative is stricter. Aggressive is more day/momentum-oriented. Change only after 30–50 trades.

Does position sizing work on crypto and forex?+

Yes. Stocks → shares; forex → lots; crypto → coins. Set Account Size and Risk % correctly. Turn RS vs SPY OFF for non-equities.

Are stops and targets correct for short trades?+

Yes. Risk, stop, and target are direction-aware.

Does it include TradingView alerts?+

Yes. Built-in alerts for Early A+ and Confirmed A+ (long or short).

What do the confluence tags mean?+

RS, MTF, ADX, Weekly (W), BOS, OB, PULL, VOL, RIB and related structure tags. Want a cluster — not one lonely tag. Deeper playbooks are in the manual.

What settings should I start with?+

Balanced. Account Size = real capital. Risk 0.75–1%. Confirmed ON. Early ON to study. RS vs SPY ON for stocks only. Weekly bias ON for swing. Leave advanced alone. Add alerts.

How should I test for the first month?+

Defaults. Confirmed Long/Short only. HIGH/ELITE. Strong Trend or clear Trending. Exact dashboard size. Journal 30–50 trades.

What timeframes work best?+

Day: 5m / 15m / 30m. Swing: 1H / 4H / Daily. Always respect higher-timeframe alignment.

Why WATCH when Score is 94 ELITE?+

Strength ≠ fresh trigger. Spacing and signal gates prevent late entries. Set alerts and wait for Confirmed.

Is this financial advice?+

No. Educational/analytical tools only. Trading involves substantial risk of loss. DYOR. You are solely responsible for your decisions.
Ready for a process — not another indicator pile?

Get Banger A+ Pro: elite scanner, Professional Manual, lifetime updates, 30-day guarantee, and founding perks for the first 50 buyers.

By purchasing you acknowledge trading risk and that tools are educational only. Risk disclaimer

Banger A+ Pro

$127 once · 30-day guarantee

Get access